How to Draw a Face in 7 Easy Steps

It turns out that I love faces. Whether it be sketching, drawing, painting, an art piece, or an illustration, I delight in capturing a subject from the neck up.
Before I show you how to draw a face in 7 easy steps, I’d like to share a self-portrait that my art teacher Mr. Houseman recently sent me!
Disclaimer. I did this self-portrait not knowing the 7 steps that I'm about to share with you.

Flashback!
This is ‘ME’!
17 years old.
An exchange student, in my final year of high school at Blackduck High School, Minnesota, USA.
Does it look like me? Well, sort of.
The eyes are wonky, the nose is too narrow and long, the lips are not mine, my hair looks like it's been stuck on like an afterthought, and my eyes… I remember spending a lot of time on those eyelashes! Having said all of this, I remember being so proud to be able to draw a likeness.
Self Reflection
Looking at it now, I’m taken by how it connects with how I was at that time – BIG dreams and few responsibilities! I didn’t know it at the time, but I was fearless, and that is something that I am keen to tap into again.
This portrait is certainly no masterpiece, but it did plant a seed for my love of faces, be it character design, illustration, experimentation, or art. There’s something that excites me about the reveal of a personality through simple marks on paper.
Given the state of the world post-Covid and lockdowns, I’m personally feeling out of sorts – I'm feeling shattered –– like my brain, my heart and my soul are not in alignment, (I'll share more about this later). But there's one thing that I do know. Historically, it is my creativity that pulls me through, even in the darkest of times.
The simple process of gathering and reflecting on the faces and portraits that I've done over the years has given me an opportunity to reconnect with that 17-year-old's seed of inspiration! It turns out that faces thread through everything that I enjoy creating. And that is something that I'll be exploring more.
"Learn the rules Like a pro, so you can break them like an artist." – Pablo Picasso
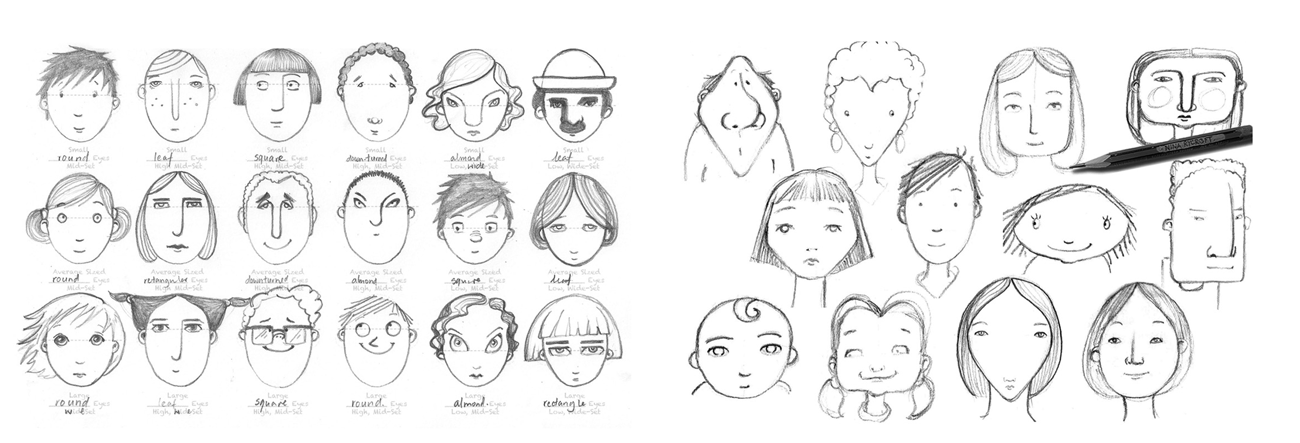
To be able to design characters, paint a portrait, sketch a face, or draw a self-portrait, you first need to understand basic face proportion. Once this is understood you can then exaggerate or soften features to suit the needs of your character.
As you may already know, I have a passion to share skills that are game changes!
My love of faces inspired me to put together a series of character design classes on Skillshare that focus on the face and head. If you want to build on what I share in this blog, I’m giving away 12 free spots on my Face Facts: Beginners Guide to Drawing a Self Portrait.
My Plan
Over the next little while, I will be publishing a series of ‘How To’ blogs (once a month), taking a deep dive into specific areas of character design and illustration. I’ll be adding my own personal experience and artwork as examples, and adding to the mix, things that tickle my interest.
So stay tuned, and please share this blog with anyone you think might also find these blogs helpful.
Before sharing how to draw a face in 7 easy steps, being a visual person, I find it helpful to see how this could actually be applied to the things that I'm working on.
How to apply the 7 steps
Allow me to share a range of my personal sketches, drawings, artworks, and experiments, using different mediums –– some large, some small and all have benefitted from knowing the basics of how to draw a face.
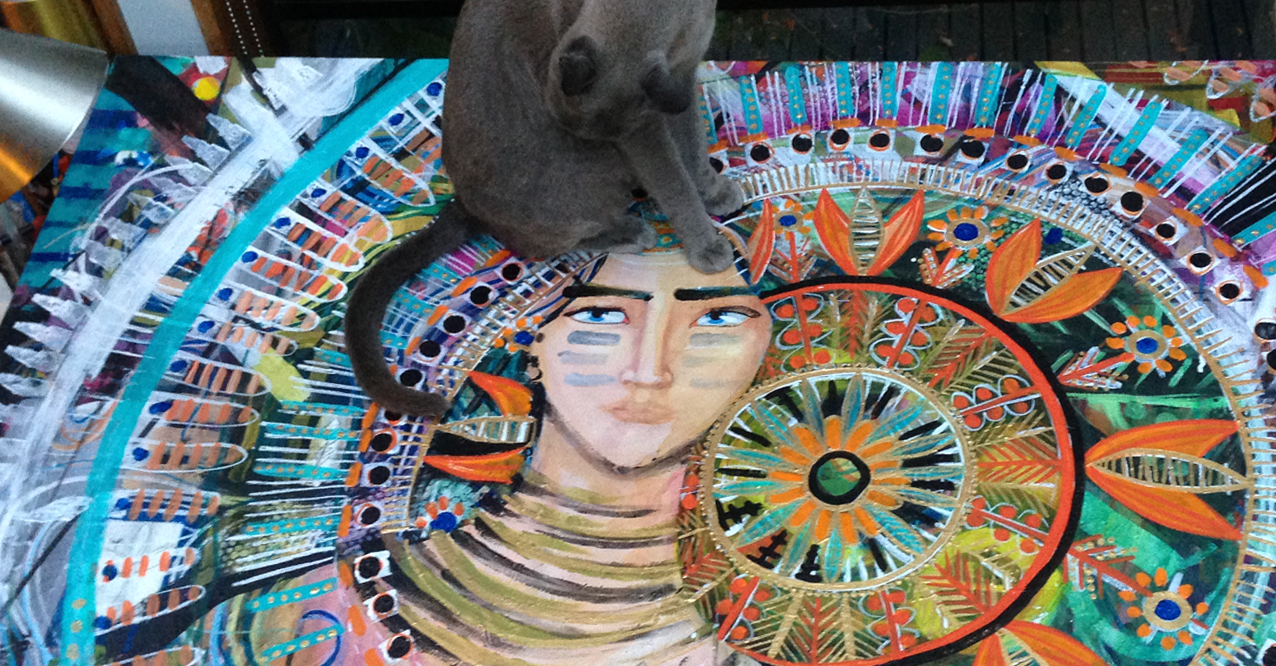
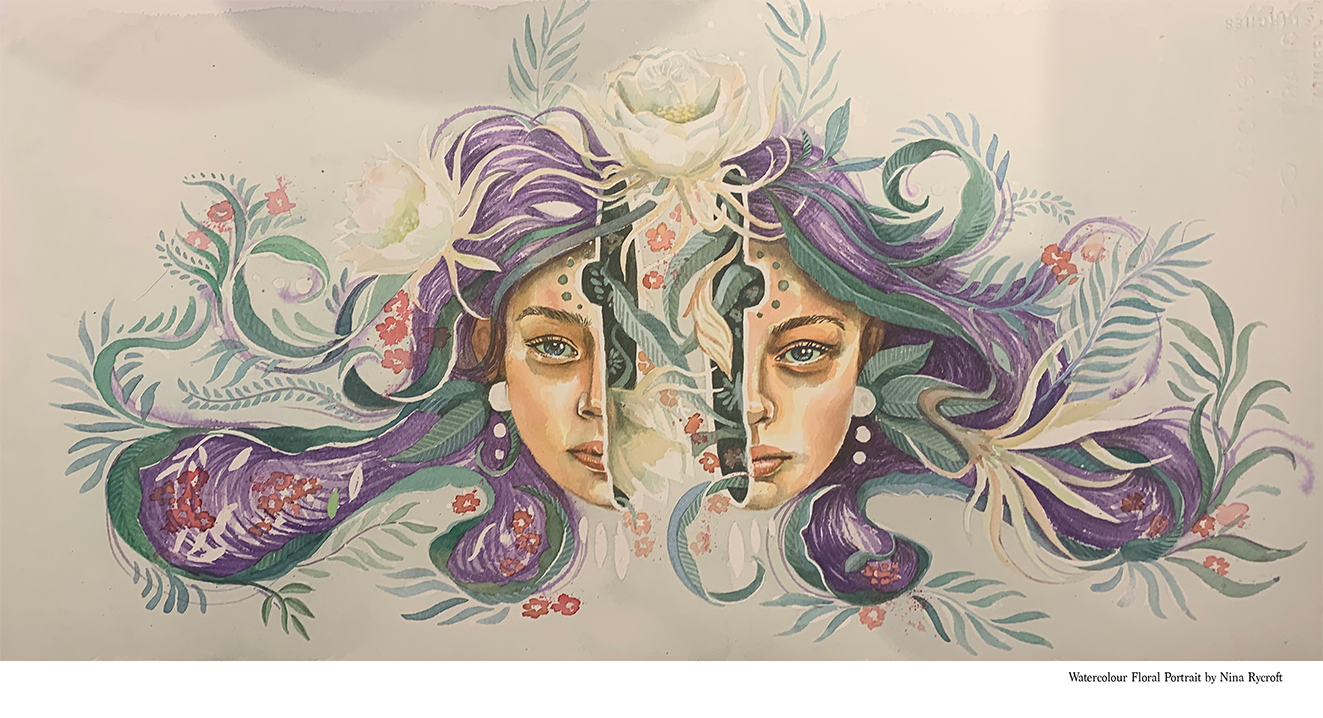 This is a watercolour that I did for my sister's 50th birthday. She and her partner grow flowers for their Pureheart Alchemy products, and one of her favorite flowers is the Queen of the Night –– a flower that only blooms at night! Isn't that magical? So I cracked the face in half and placed blooms and foliage inside and all around forming an almost graphic, logo-type look.
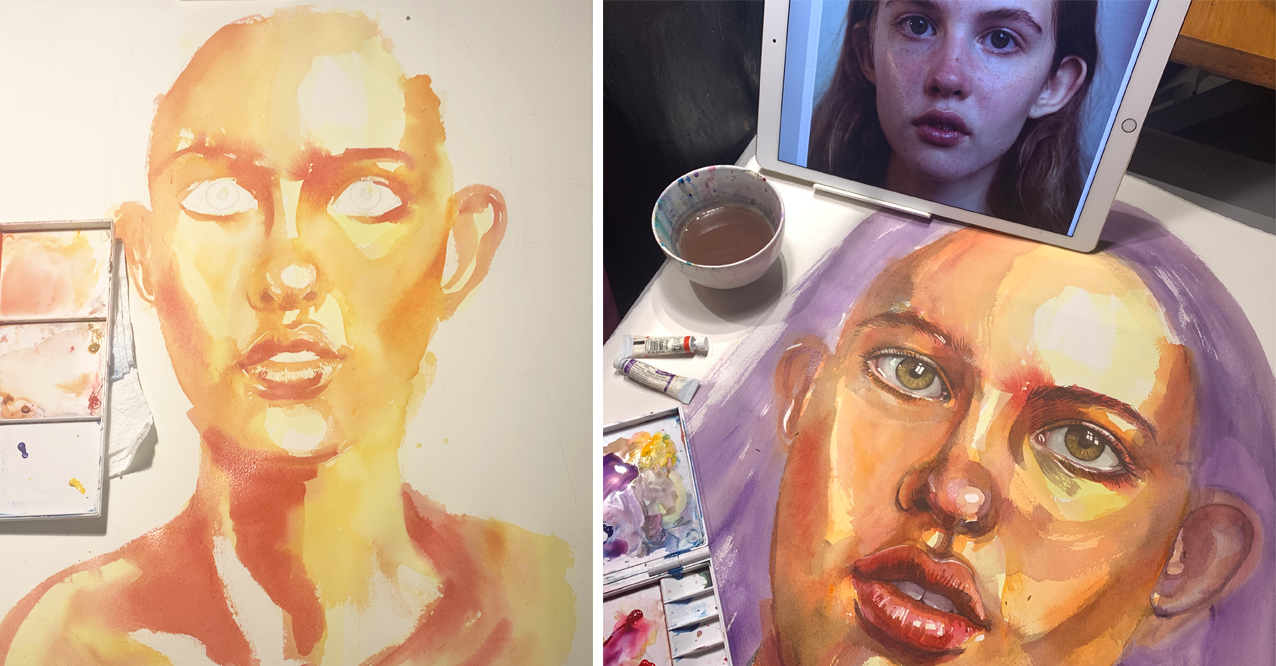
Again, another watercolour, but this time much larger, (A1 and cold press, 300gsm). I wanted to challenge myself to be bold with my brush strokes, as well as work on details in the eyes. And to practice a new application of skin tone – using a layer with warm tones (yellow-reds), then when dry, working a second layer using cool tones (blues-greens).
After completing illustrations for a picture book (where the artwork is relatively small and precise), working large is my jam.
Here is another large painting, this time acrylic on canvas. From Flora Bowley's The Bloom True e-Course. This was my first experience doing an online art course and the experience inspired me to put together my own 8-week Picture Book Illustration e-Course.
This painting technique was all about building up layers with intuitive mark-making. The whole time I was on this course, faces were popping up everywhere! This warrior woman revealed herself for a moment in time and now she sits a few layers beneath a very different painting.

Above is my series of encaustic portraits. I flurry of work that I did over the course of a week. Having just finished laying a deck, there was a pile of wooden offcuts and so I decided to use the offcuts to play and experiment. This was my second attempt at working with wax, so I am by no means an expert, but I was pleased with the results. Knowing the basic proportions and placement of the eyes, nose, mouth, and ears, really helped with my confidence and laying down bold strokes of wax. Encaustic is such a beautiful medium to work with, and I definitely plan to do more.
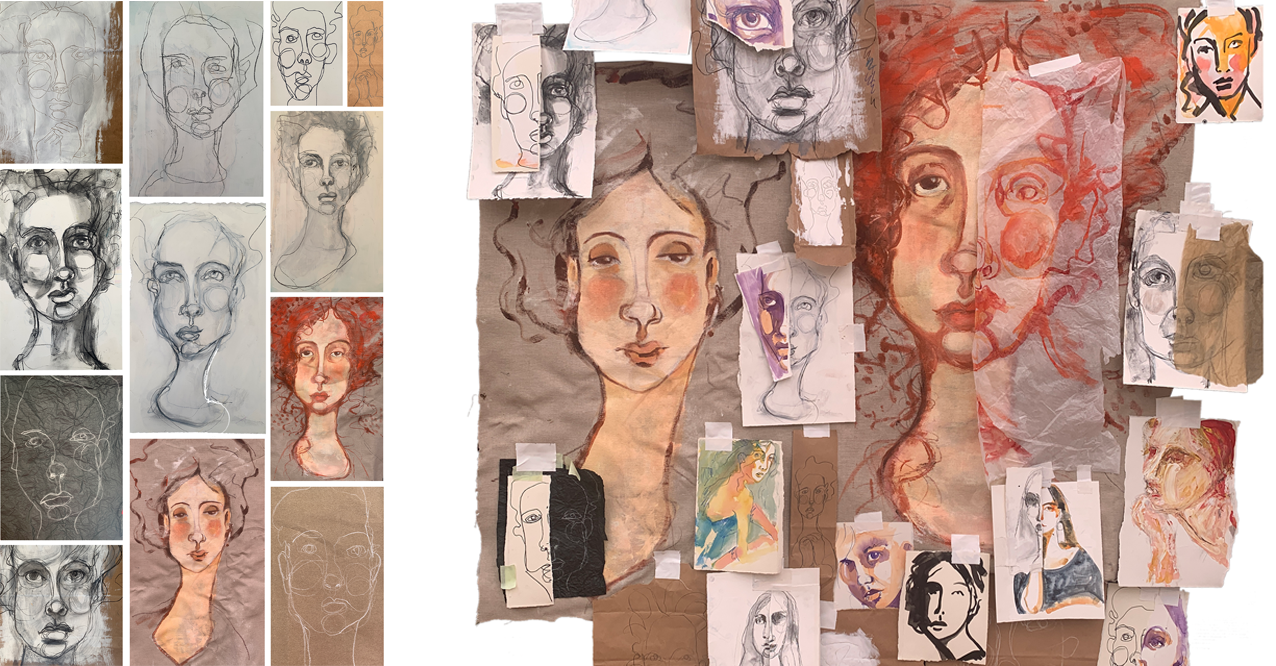
And more recently, I took part in Janin Oliver's Wondering Muse online course. I had a free weekend and worked on a table that I set up in the garden. This course did it for me, I was able to explore with different mediums, brushes, charcoal, and pencil, working both small and large and everything in between. And slowly, slowly across the weekend, I felt like I really found my line, my style, my artistic voice. I'm still a work in progress, but I do love those moments where I go... "Oh, there you are! Nice to see you again."
So, now that I've shared with you how I have applied the steps to a variety of personal projects, I’ll now walk you through the 7 steps in more detail.
Once you have nailed the basic proportions, placements, and sizes of things, you can then break out and apply this to your own work.
How To Draw a Face in 7 Eas Steps
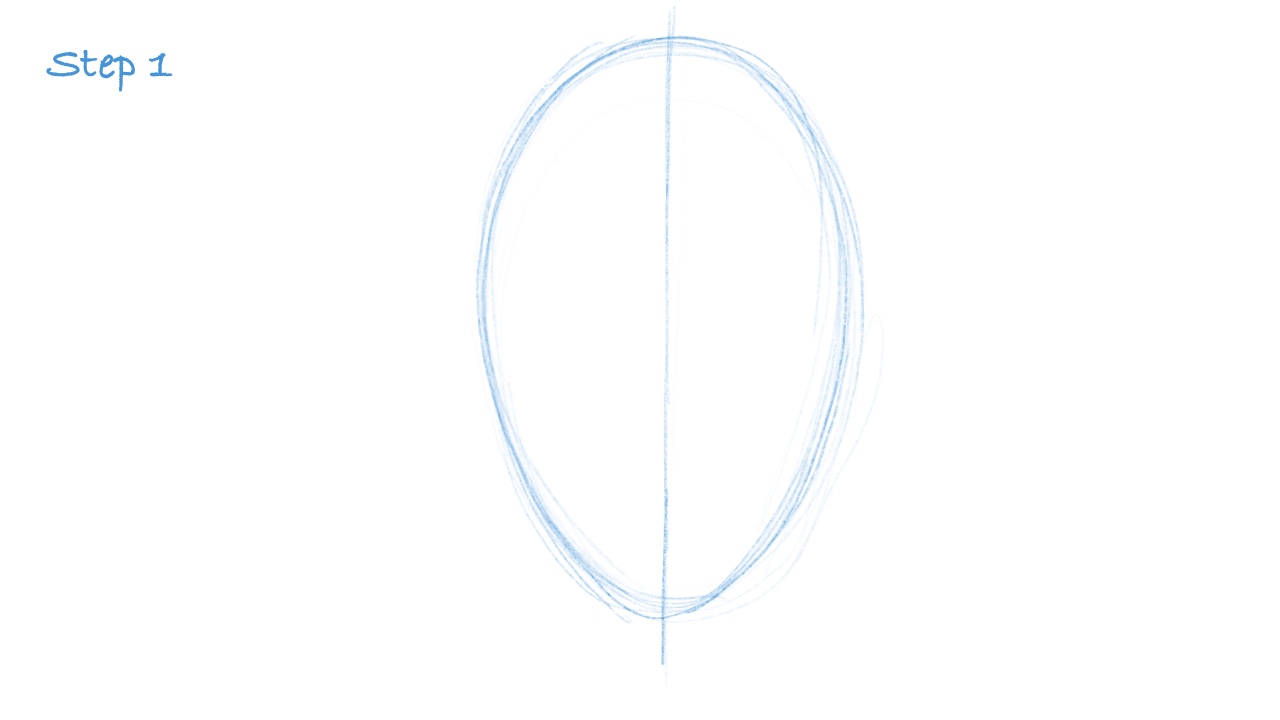
Step 1. The Head
Draw a large head shape on your paper. Fill your page and remember, that heads are shaped more like eggs, not circles.
Drawing ovals is actually quite difficult. And probably the hardest thing that I will ask you to do in the 7-step process, so go easy on yourself! You can see how many goes I had before my oval took shape. Remember to keep your work light, don't grip the pencil too tight, and fill your page. Try drawing your egg shape twice the size of an actual egg.
It's always helpful to know the center, so once you have your oval/egg shape, divide it in half.
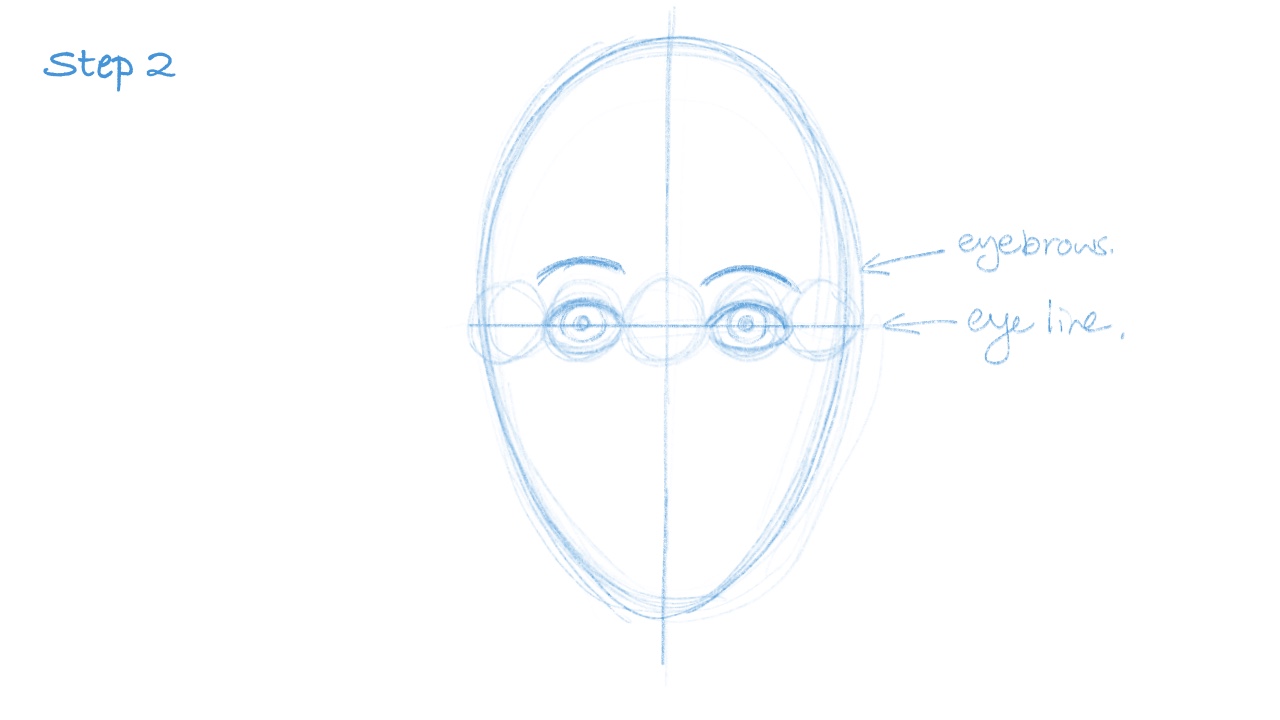
Step 2. Eyes and Eyebrows
Eyes are halfway down the face. So divide your head in half with a horizontal line.
If you look at someone face on, they will have room for five eyes across the front of their face. You can divide the horizontal line into five equal spaces to figure out how big to make the eyes. You can see that I have drawn five circles (the complete eyeball) to work out where my eyes sit. I've then gone back in to create a basic eye shape.
Eyebrows tell a lot about a person's mood. Notice that the eyebrows (when relaxed) sit in a soft arch just above the top of the circle (or eye socket).
We'll be adding more detail to the eyes and eyebrows later, this is more about the size, proportions, and placement of things.
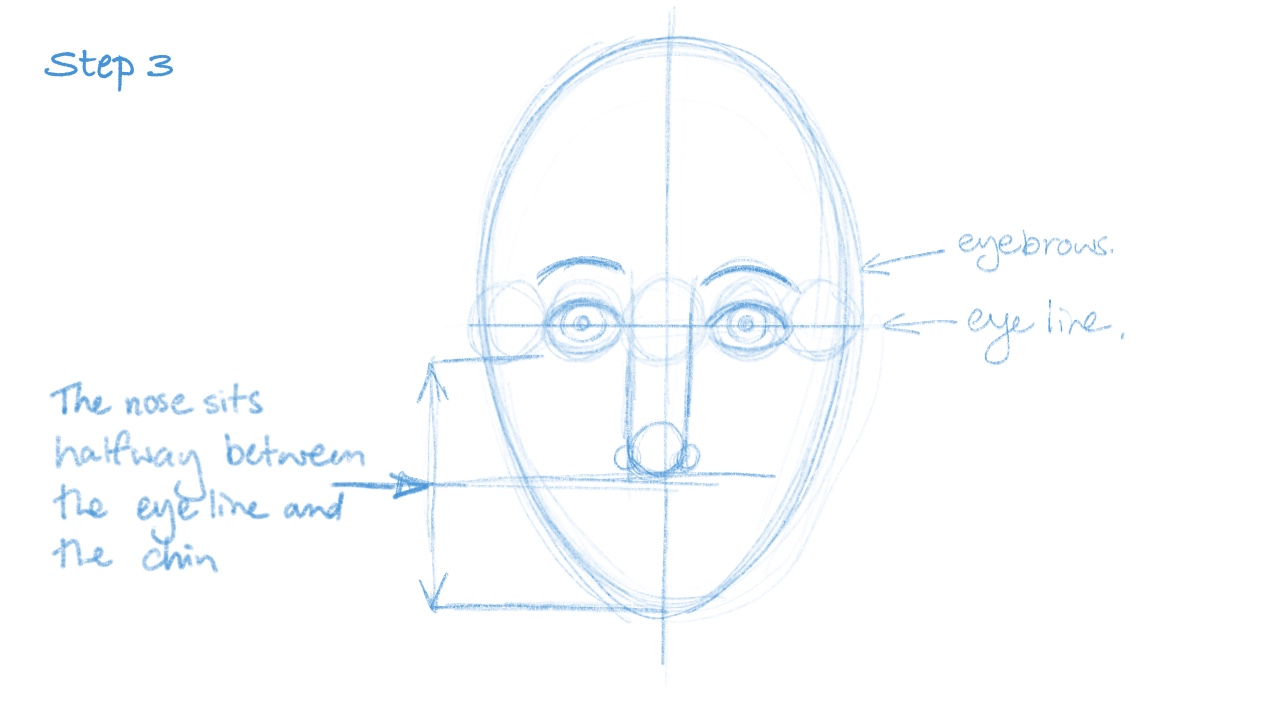
Step 3. The Nose
The size of the nose depends on the person. The bottom of the nose is often as wide as the inside corners of the eyes. So you can draw two lines down from the inside corners of the eyes.
Usually, the bottom of the nose is halfway between the eye line and the bottom of the chin. Now you have a nose box- draw the nose. I like to draw a circle for the button part of the nose and two smaller circles on either side for the nostrils.
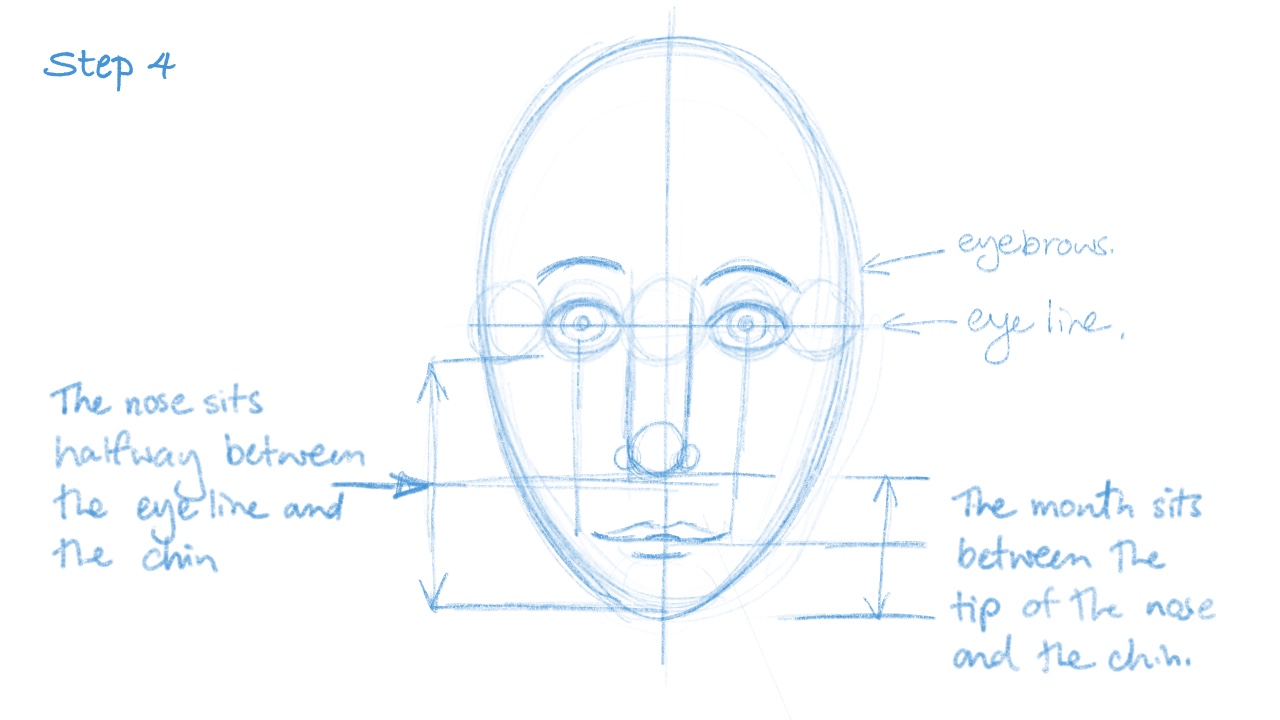
Step 4. The Mouth
Draw another line halfway between the nose and the chin. A relaxed mouth fits between these two vertical, lines.
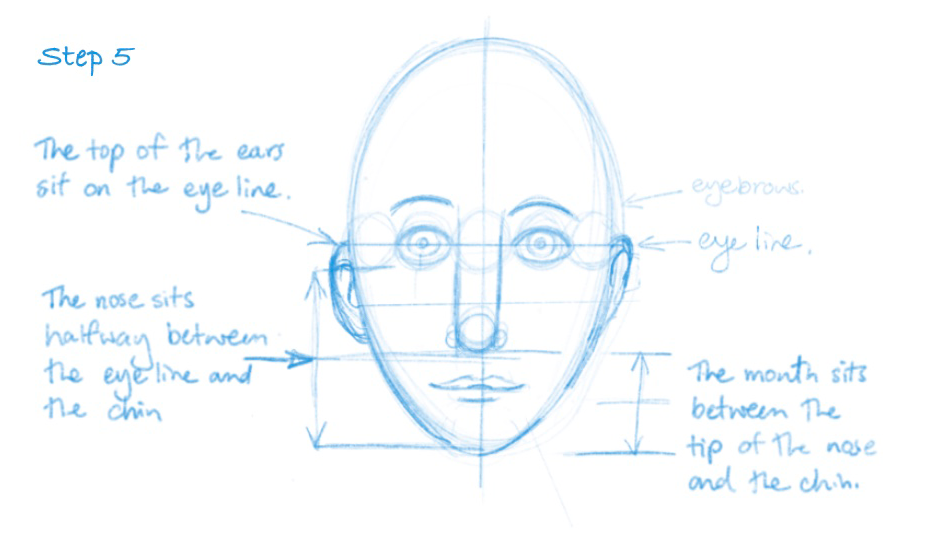
Step 5. The Ears
Ears are bigger than many people think. They stretch from the eyes to below the nose. Use the horizontal line you first drew for the eyes to line up the top of the ears. The ears will end between the bottom of the nose and the mouth. Don't be shy! Draw the ears big enough!
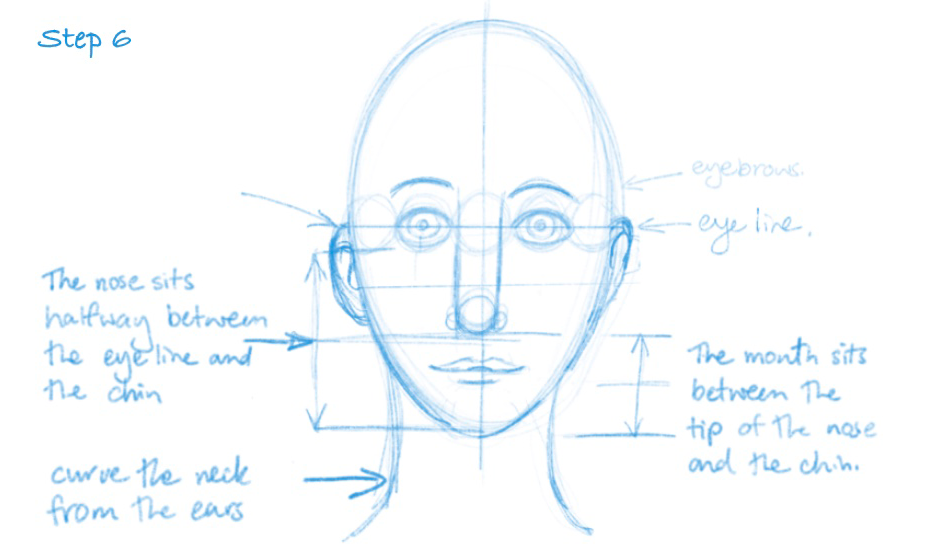
Step 6. The Neck
Two curved lines starting at the ears should do the trick for the neck.
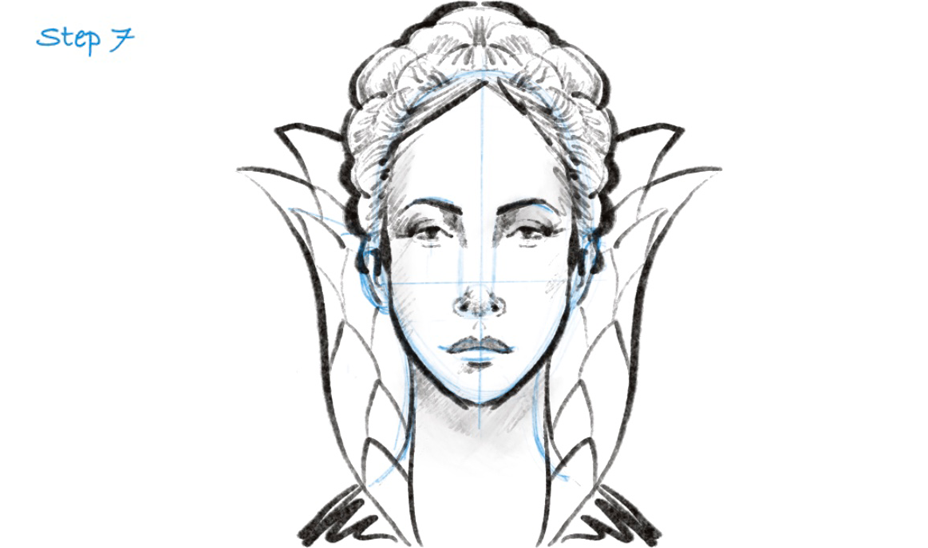
Step 7. Adding Details and Accessories
Now it's time to bring your character to life by adding detail to the features, shading, hair, and accessories. You can choose to do a self-portrait, a fairytale character, or someone in your family, it's actually a lot of fun to practice this process using selfies or photos of friends or family.
If you did find this blog useful in any way, hit replay and let me know. You can also share your faces with me on Instagram ninarycroft #drawwithnina
That’s all for now! Happy sketching!

Stay connected and get the latest illustration news and inspiration delivered straight to you inbox!

Nina Rycroft
Picture Book Illustrator
Since 2000, I’ve been bringing picture book stories to life with my illustrations. Now, I’m excited to share all the tips and insights I’ve gathered along the way with you. Sign up for my newsletter to be the first to hear tips, get inspired, and stay updated with the latest in picture book illustration news!
Recent Posts